
As spring approaches and the planting season draws near, gardeners everywhere are preparing their landscapes and vegetable patches for new growth. One of the most crucial steps in ensuring a successful planting season is testing your soil. Soil health is the foundation for thriving plants, and knowing what’s happening beneath the surface can help you make informed decisions on how to enhance your garden’s productivity. The good news is, you don’t need to be an expert to test your soil. With the right tools and knowledge, you can perform a soil test at home and make simple adjustments that will improve your garden’s performance.
In this guide, we’ll walk you through the importance of soil testing, how to conduct a soil test at home, and ways to improve your soil based on your test results.
Why Soil Testing Is Essential for Healthy Plants
Soil is more than just dirt. It’s a complex environment that supports plant roots, absorbs water, and provides the nutrients needed for growth. But not all soils are created equal. Some might be too acidic or too alkaline, while others might be lacking in essential nutrients like nitrogen, phosphorus, or potassium. A soil test is essential to understanding your soil’s composition and health, and it gives you the information you need to make necessary amendments.
Without testing your soil, you might be guessing at the needs of your garden. Over-fertilizing or under-fertilizing can lead to stunted growth, poor flowering, or an overall lack of vitality. Similarly, planting in soil that’s too acidic or alkaline for your specific plants can hinder root development and nutrient uptake.
By performing a soil test at home, you can:
- Understand nutrient deficiencies: Knowing what’s missing in your soil helps you choose the right fertilizers or amendments.
- Optimize pH levels: Adjusting the pH of your soil can improve nutrient availability for your plants.
- Improve soil texture and structure: Identifying issues like poor drainage or compacted soil helps you decide if you need to improve aeration or drainage.
So, how do you go about testing your soil to ensure it’s ready for planting?
Different Types of At-Home Soil Test Kits
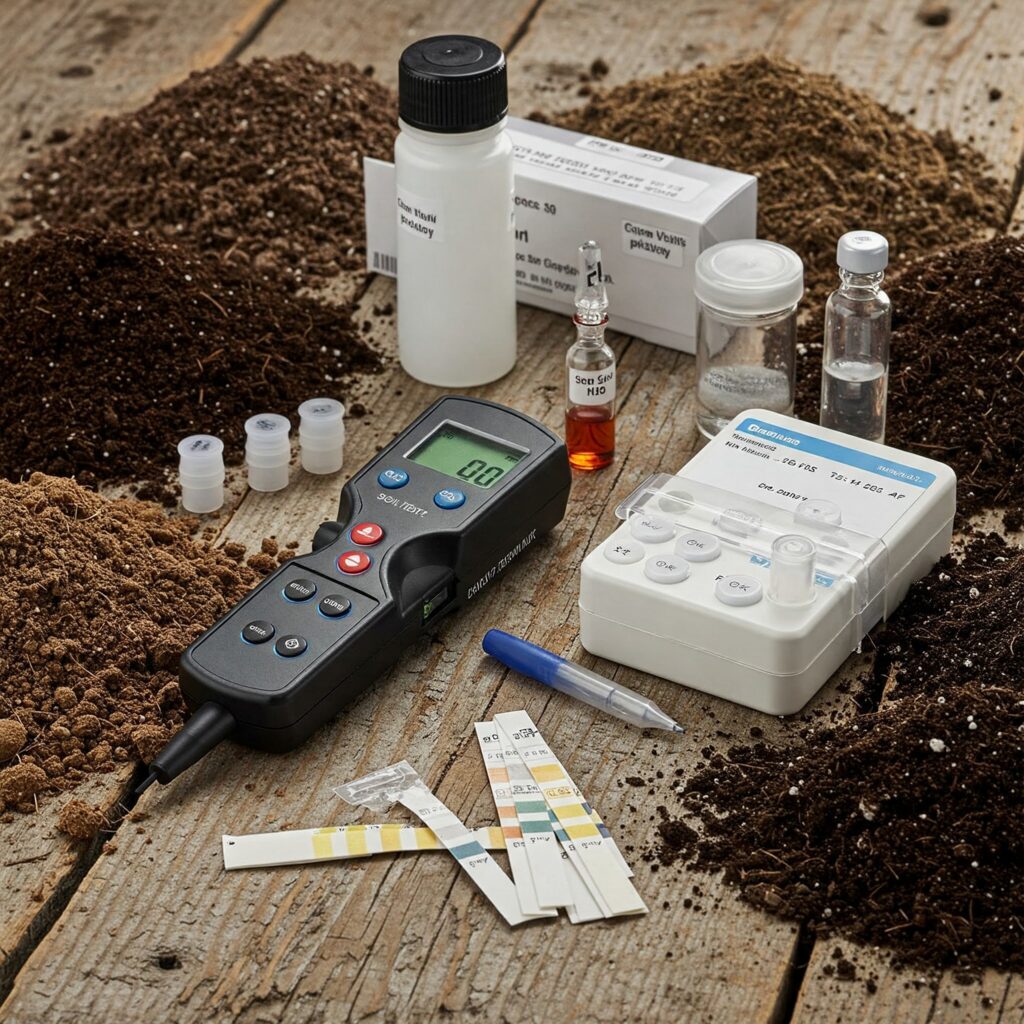
There are several at-home soil test kits available, each with its own method of assessing your soil’s health. These kits vary in price, accuracy, and the range of readings they provide. Let’s break down the three most common types of soil test kits at home: the probe style, pH strip tests, and solution-style kits.
The Probe Style Test Kit
The probe style soil tester is a popular option for homeowners looking for a simple and versatile way to test their soil. These devices typically come with a metal probe that you insert into the ground to get real-time readings. Depending on the model you purchase, probe testers can measure various soil characteristics, such as:
- pH levels: Determines whether your soil is acidic, neutral, or alkaline.
- Moisture level: Helps you assess whether your soil is too dry or too wet for optimal plant growth.
- Light levels: Measures how much light your garden area is receiving, which is especially helpful if you’re growing light-sensitive plants.
- Temperature: Provides information on soil temperature, which is important for determining when to plant specific crops.
- Salinity: Some advanced models can measure the salinity of your soil, which is crucial for preventing issues with plant health caused by excessive salts in the soil.
How to Use a Probe Style Soil Tester:
- Simply insert the probe into the soil at various depths around your garden.
- The probe will display readings for each of the measured factors on a small digital or analog screen.
- Use the data to assess your garden’s needs—whether it’s adjusting watering schedules, optimizing light exposure, or adjusting the pH levels.
Advantages:
- Easy to use and fast results.
- Provides multiple readings for a comprehensive view of your soil’s condition.
- No need for chemicals or additional solutions.
Disadvantages:
- Can be less accurate compared to other methods, especially in highly compacted or rocky soils.
- Some models may not be as reliable in measuring specific nutrients like nitrogen or potassium.
Another Option: pH Strip Test Kits
Another option for testing your soil is the pH strip test kit. These kits typically include a set of pH strips that change color based on the acidity or alkalinity of your soil. While pH strip kits are straightforward, they usually only measure a limited number of factors, such as:
- Soil pH: Determines the acidity or alkalinity of your soil.
- Nutrient levels (Potassium, Phosphorus, and Nitrogen): Some pH strip kits include tests for these essential nutrients, though they may not be as detailed as other methods.
The process is similar to testing pool water with pH strips—easy, quick, and non-intrusive.
How to Use a pH Strip Test Kit:
- Mix a small sample of soil with water (usually in a provided test container).
- Place the pH strip in the solution for a few seconds.
- Compare the color change to the included chart to determine the pH level and the nutrient status.
Advantages:
- Very affordable.
- Quick and easy to use.
- Good for gardeners who want a basic overview of their soil’s pH and nutrient levels.
Disadvantages:
- Limited in scope—only gives you pH and basic nutrients, not a comprehensive soil analysis.
- Accuracy can be affected by environmental factors (e.g., water quality, temperature).
Solution-Style Test Kits (ex. LaMotte Soil Test Kit)
For those who want a more detailed analysis, the solution-style test kits, such as the popular LaMotte Soil Test Kit, provide a deeper look at your soil’s composition. These kits involve mixing soil samples with a solution, which changes color based on the nutrient content and pH of the soil. The test results are then compared to a color chart to determine the levels of various nutrients.
Solution-style kits are commonly used by gardeners who want precise readings of important soil nutrients like:
- Nitrogen: Essential for healthy leaf and stem growth. A nitrogen deficiency can lead to yellowing leaves and poor overall plant growth.
- Phosphorus: Necessary for root development and flower production. Insufficient phosphorus often results in poor root growth and delayed flowering.
- Potassium: Supports overall plant strength, disease resistance, and fruiting. Potassium helps plants withstand environmental stress and promotes healthy fruit and vegetable yields.
- Soil pH: Helps you determine the best adjustments for your soil’s acidity or alkalinity.
How to Use a Solution-Style Test Kit:
- Take a soil sample and mix it with the provided solution according to the kit instructions.
- After shaking or stirring the mixture, let it settle for a few minutes.
- Compare the color of the mixture to the included color chart to determine your soil’s nutrient levels and pH.
Advantages:
- Provides a comprehensive analysis of soil nutrients and pH.
- Accurate results for gardeners who want to tailor their soil amendments.
- Great for specific crops that require balanced soil nutrition.
Disadvantages:
- More expensive than pH strips and probe-style kits.
- Requires a bit more time and effort to perform the test and interpret the results.
- Needs to be done carefully to avoid mistakes in mixing or reading the chart.
Understanding Your Soil Test Results

Once you’ve completed your soil test at home, the next step is interpreting the results. Depending on the type of kit you use, you’ll receive different types of data. Whether you used a probe-style kit, pH strips, or a solution-style kit, the core information revolves around the soil’s pH and nutrient levels.
Soil pH
Soil pH measures the acidity or alkalinity of your soil, which significantly affects nutrient availability. Most plants thrive in a soil pH range between 6.0 and 7.0 (slightly acidic to neutral). A pH that’s too high (alkaline) or too low (acidic) can lock essential nutrients out of reach for plants, resulting in poor growth.
- Acidic Soil (pH 5.0–6.0): This is common in some gardens, especially those growing acid-loving plants like blueberries, azaleas, or rhododendrons. However, most garden vegetables and many ornamental plants prefer neutral soil.
- Neutral Soil (pH 6.0–7.0): Ideal for most plants, as it allows for the best nutrient absorption.
- Alkaline Soil (pH 7.0–8.0): This type of soil may be suitable for plants like lavender, but most vegetables and flowers will struggle if the pH is too high.
Nutrient Levels
Most solution-style test kits, such as the LaMotte Soil Test Kit, provide a more detailed analysis of your soil’s nutrient content. These kits mix your soil with a testing solution, which changes color depending on the levels of key nutrients. Some common nutrients tested include:
- Nitrogen: Essential for healthy leaf and stem growth. A nitrogen deficiency can lead to yellowing leaves and poor overall plant growth.
- Phosphorus: Necessary for root development and flower production. Insufficient phosphorus often results in poor root growth and delayed flowering.
- Potassium: Supports overall plant strength, disease resistance, and fruiting. Potassium helps plants withstand environmental stress and promotes healthy fruit and vegetable yields.
In addition to nitrogen, phosphorus, and potassium, solution-style kits also provide a pH reading, helping you determine whether your soil needs adjustments to become more acidic or alkaline. Understanding these nutrients and their roles in plant health is essential for making targeted soil improvements.
How to Improve Your Soil Based on Test Results
Once you’ve reviewed your soil test results, the next step is to improve your soil’s health based on what you’ve learned. Here are some common soil amendments and actions you can take:
- Adjusting pH: If your soil is too acidic (low pH), you can add lime to raise the pH. If it’s too alkaline (high pH), adding sulfur can help lower it.
- Adding Fertilizers: Based on the nutrient levels, you can apply fertilizers rich in nitrogen, phosphorus, or potassium as needed.
- Improving Soil Texture: If your soil is too compacted or has poor drainage, adding organic matter like compost or mulch can improve its structure.
Conclusion
Testing your soil before planting season is a simple yet vital step in creating a thriving landscape. Whether you choose a probe-style test, pH strip kit, or solution-style test kit, the insights gained from testing will help you make informed decisions about how to amend and optimize your soil. Armed with the right data, you can adjust pH levels, correct nutrient deficiencies, and improve soil texture, leading to healthier plants and a more fruitful growing season.
By understanding your soil’s needs and making targeted adjustments, you’re setting the stage for a beautiful, productive garden that will thrive through every growing season.
Read Next:
Spring Landscaping Magic: Create a Yard That Inspires
Additional Resources:
For information on sending samples to be tested in the lab check out this page from Mississippi State University Extension
http://extension.msstate.edu/content/soil-testing
For more information on the importance of soil testing check out this PDF resource from the USDA
https://www.nrcs.usda.gov/sites/default/files/2022-09/stelprdb1167377-soil-testing.pdf